
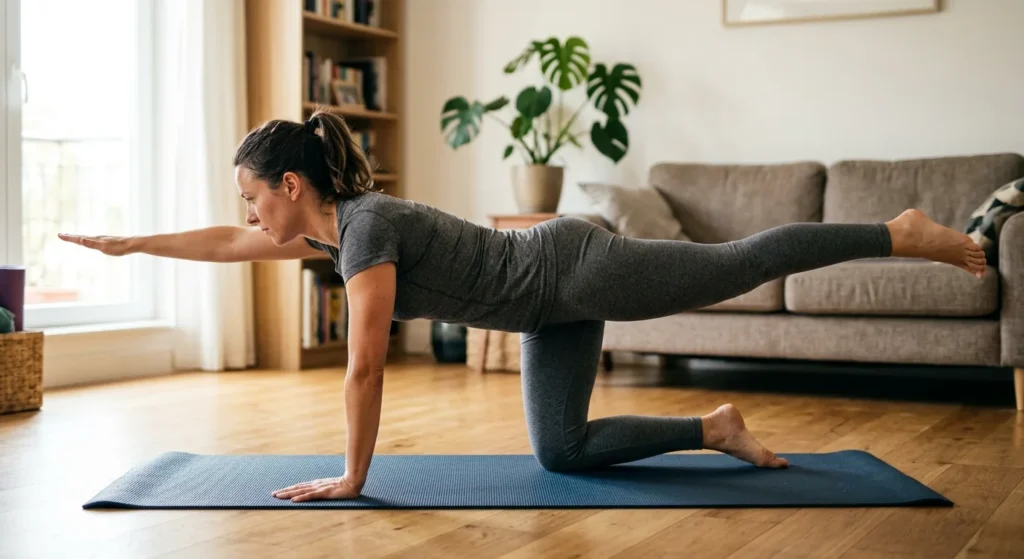

A bird dog workout starts on your hands and knees. You reach one arm forward and the opposite leg straight back until both are level with your torso, hold for a few seconds, and switch sides. The goal is to keep your spine still while your limbs move, which is why physical therapists use the bird dog so often for low back care.
It takes about five minutes, needs a mat at most, and scales from easy to hard. This guide covers form, muscles worked, how physical therapy programs use it, rep ranges, easier and harder versions, and the mistakes that quietly waste the effort.
This article is general education, not medical advice. If your back pain is severe, getting worse, or comes with numbness, leg weakness, fever, or bladder or bowel changes, see a licensed clinician before exercising.
What the Bird Dog Exercise Actually Trains
The bird dog is an anti-movement exercise. Your arm and leg move, but your trunk resists rotating, sagging, and arching. That is why a slow, small rep usually beats a big, swinging one.
Spine researcher Stuart McGill of the University of Waterloo includes it in his “Big Three” back exercises, alongside the curl-up and the side bridge. He picked them because they challenge the muscles around the spine while keeping compressive load on it relatively low.
Core stability here means more than visible abs. The deep and surrounding muscles share the job of holding your spine steady while you reach, step, lift, and carry.
Muscles Worked
The bird dog works several areas at once, which is part of its appeal.
- Spine extensors, including the erector spinae and multifidus along the back of the spine
- Glutes and hamstrings of the lifted leg
- Deep abdominals and obliques, which keep the ribs and pelvis from twisting
- Shoulder muscles of both arms, including the serratus anterior of the supporting arm
A 2007 study by Ekstrom and colleagues in the Journal of Orthopaedic & Sports Physical Therapy measured muscle activity during nine rehabilitation exercises, and the quadruped arm and opposite leg lift was one of them. It showed meaningful activity in the back extensors and glutes. Muscle readings are only one piece of the picture, but they match what most people feel: a working back, hips, and shoulders.
How to Do a Bird Dog Step by Step
Slow and level beats high and fast. Use a mat or carpet and follow these steps.
- Set up on hands and knees, wrists under shoulders and knees under hips. Spread your fingers and press the floor away.
- Keep your back flat and your neck long, with your eyes on the floor a few inches ahead of your hands.
- Brace lightly, as if someone might tap your stomach. You should still be able to breathe normally.
- Slide one foot back along the floor, then lift that leg until it is level with your hip.
- Reach the opposite arm forward, thumb up, until it is level with your shoulder.
- Hold for 5 to 10 seconds while you keep breathing.
- Lower with control, then switch sides.
Think about making your arm and leg longer, not higher. The reach comes from stretching away from your center, and your hips and shoulders stay level.
The Three-Checkpoint Self-Check
Many guides tell you to keep your back flat and leave it there. A more usable method is to check three spots on every rep.
Low back: it should not arch or sag. If your belt line dips, the leg is too high or your brace has let go.
Hips: both hip bones should point at the floor. If the lifted side opens toward the ceiling, lower the leg until your pelvis stays square.
Ribs: your lower ribs should not flare or drop toward the floor. If they do, shorten the hold and breathe out gently as you lift.
A common coaching trick is to rest a light object, such as a small yoga block, on your lower back. If it slides off, your pelvis moved. You can also prop your phone up and film a side view, which often shows arching that feels fine from the inside.
Why Physical Therapists Use the Bird Dog
In clinic, the bird dog shows up most often in programs for low back pain, core retraining after injury, and general trunk control. It is easy to teach, easy to adjust, and gives the therapist a clear view of how your spine, hips, and shoulders cooperate.
Exercise has solid guideline support for back pain. The American College of Physicians’ 2017 guideline, published in Annals of Internal Medicine by Qaseem and colleagues, recommends non-drug treatments for chronic low back pain, with exercise among the options. That is part of why movement-based care leads many physical therapy plans. It is a general recommendation, not proof that the bird dog specifically fixes any one person’s pain.
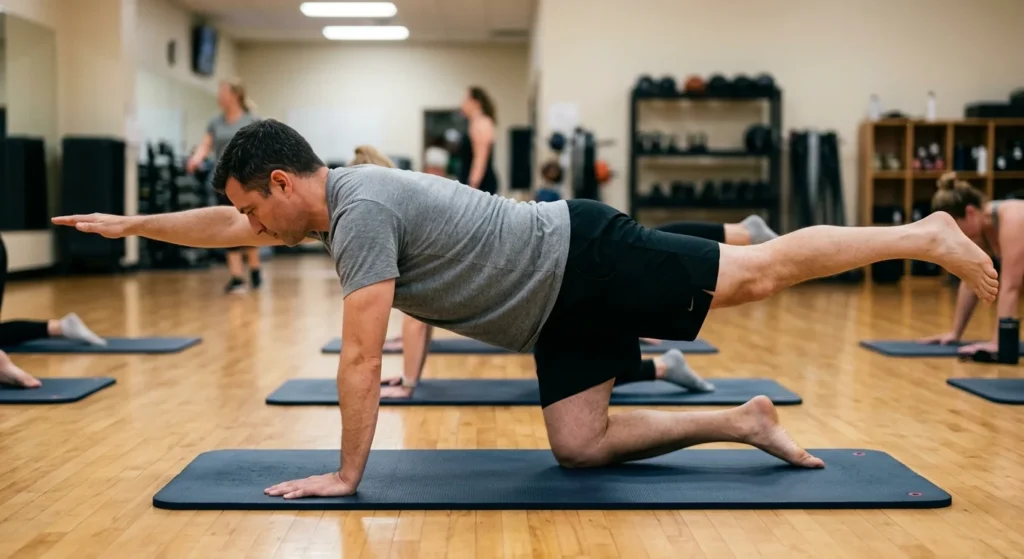
A therapist will usually watch how you move before prescribing anything. They may shorten the lever (arm only or leg only), change the hold time, add a breathing cue, or swap in a different exercise if the bird dog provokes symptoms. That individual adjustment is what an article or video cannot replace.
What a Physical Therapy Dose Often Looks Like
Dosing varies by person. McGill’s published programs pair the bird dog with holds of about 10 seconds and a descending rep pattern, such as 6, then 4, then 2 per side across sets. The idea is to stop each set before form breaks down and fatigue shifts the load onto the wrong tissues. Your own therapist may start lower, such as three to five 5-second holds per side.
How Many Reps and How Often
Most healthy adults do well with two or three sets of 5 to 8 slow reps per side, holding each rep for 5 to 10 seconds. A bird dog workout at that volume takes under ten minutes. End a set when your form slips, not when you hit a number.
Because the load is low, many people do short sets most days, often as a warm-up. For general conditioning, the CDC’s physical activity guidelines for adults call for muscle-strengthening activity on at least two days a week. The bird dog can sit inside that routine next to squats, rows, and push-ups.
Mild soreness in the glutes or back muscles the next day is normal. Sharp, shooting, or worsening pain is not, and it is a reason to stop and talk to a professional.
Easier Bird Dog Variations
If the full version wobbles, scale it down. Each option keeps the same goal of a still spine.
- Leg only: lift one leg at a time with both hands on the floor.
- Arm only: reach one arm forward and keep both knees down.
- Heel slide: slide one foot back along the floor without lifting it, which teaches pelvic control.
- Knee padding: fold a towel under your knees if the floor bothers them.
- Wrist relief: use fists, forearms, or dumbbell handles to keep your wrists straight.
Shortening holds to 3 seconds is also fine. Build time first, then add the reach.
Harder Bird Dog Progressions
Move up only when you can finish three sets of 10-second holds with all three checkpoints clean.
- Elbow to knee: from the extended position, draw your elbow and knee together under your body, then reach out again slowly.
- Resistance band: loop a light band around your foot and the opposite hand.
- Light weights: add a one- or two-pound ankle or wrist weight.
- Slow tempo: take three seconds to extend and three to return.
- Forearm version: lower onto your forearms, which changes the demand on the shoulders.
Change one variable at a time. If your back starts to arch or your hips open, go back one step.
Common Bird Dog Mistakes
Lifting the leg too high is the most common error. Past hip height, the lift comes from arching your lower back, which defeats the purpose.
Letting the hips open is the next one. When the pelvis rotates, your back is doing work the lifted glute should be doing.
Rushing also hides problems. Fast reps use momentum, and momentum covers up weakness, so count about three seconds up.
Other slips are easy to fix. Sinking between your shoulder blades on the support arm means you should press the floor away. Holding your breath builds unnecessary pressure, so breathe through the hold. Looking up cranks your neck back, so keep your eyes down.
A Beginner Bird Dog Routine You Can Do at Home
Here is a simple four-week plan. Adjust it if anything hurts.
Weeks 1 and 2: warm up with six slow cat-cow reps. Then do 2 sets of 5 reps per side with 5-second holds, three or four days a week.
Weeks 3 and 4: do 3 sets of 6, 4, and 2 reps per side with 10-second holds, four or five days a week. Rest 30 seconds between sets.
After that, choose one progression from the list above and keep the rest the same.

For a short circuit, many people pair the bird dog with a side plank and a curl-up with one knee bent, the other two moves in McGill’s Big Three. The full circuit runs about ten to twelve minutes. Film yourself once a month from the side to confirm your form still holds.
Who Should Check With a Professional First
Talk with a physician or physical therapist before starting if you have had recent back surgery, have pain that travels down a leg, feel numbness or weakness, or have wrist, shoulder, or knee problems that make the hands-and-knees position painful. People managing ongoing health conditions should also get clearance.
Stop if you feel sharp or shooting pain, dizziness, or symptoms that get worse with each rep. Pain that lingers for more than a day or two after an exercise session is worth a call to your clinician.

The bird dog is plain, and that is fine. Slow reps, a level pelvis, and honest holds do more for most people than a long list of core exercises. Give a bird dog workout four weeks, film your form, and let what you see decide when to progress.