
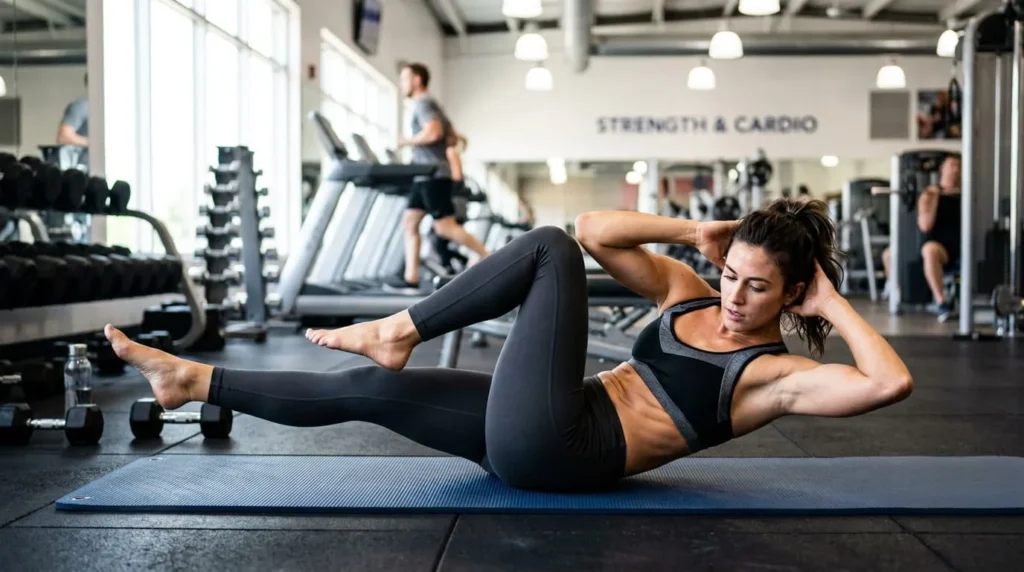

The bicycle crunch is one of the most efficient bodyweight exercises for building a stronger, more defined core. Unlike a standard crunch, it adds a rotating motion that pulls your obliques into the work alongside your abs. Done correctly, a set takes less than a minute and needs no equipment at all. Done incorrectly, it strains the neck and lower back without building much real strength. This guide breaks down the exact setup, the muscles involved, the mistakes that quietly ruin the movement, and how to fit bicycle crunches into a real training routine.
What the Bicycle Crunch Actually Trains
A bicycle crunch is a floor-based core exercise that pairs a crunch with a knee-to-elbow rotation. You lie on your back, lift your shoulder blades off the mat, and alternate driving one knee toward your chest while your opposite elbow twists to meet it. The other leg stays extended and hovers just above the floor.
That rotation is what separates this move from a plain crunch. A regular crunch mostly isolates the rectus abdominis, the muscle running down the center of your stomach. The twisting action in a bicycle crunch recruits your internal and external obliques as well, so you are training three major ab muscle groups in a single rep instead of one. This is also why fitness professionals often rank it above sit-ups and standard crunches for overall core activation, even though it looks like a small addition to a familiar move.
Muscles Worked During a Bicycle Crunch
The primary muscles trained are the rectus abdominis, the internal obliques, and the external obliques. Together, these muscles flex your spine, rotate your torso, and stabilize your midsection under load.
The transverse abdominis, a deeper muscle that wraps around your spine like a corset, also activates to keep your pelvis stable as your legs move. Your hip flexors get secondary work from the pedaling motion of the legs, which is part of why the exercise feels more demanding than a static crunch. None of this requires equipment, which is a big reason bicycle crunches show up in home workouts, HIIT circuits, and warmups alike.
How to Do a Bicycle Crunch Step by Step
Starting Position
Lie flat on your back on a mat, legs extended and feet on the floor. Place your fingertips lightly behind your head, elbows flared out wide. Do not interlace your fingers or pull on your neck at any point.
Press your lower back into the mat and pull your belly button toward your spine. This single cue prevents most of the lower back strain people associate with the exercise. Lift your head, neck, and shoulder blades off the mat using your abs, not your hands.
The Movement
Bring your knees up so your shins are roughly parallel to the floor, then extend one leg out at about a 45 degree angle while keeping the other knee pulled toward your chest. Rotate your torso so the opposite elbow reaches toward the bent knee. The movement should come from your rib cage rotating, not from yanking your elbow across your body.
Switch sides in a smooth, controlled pedaling motion. Exhale as you rotate toward each knee and inhale as you return to center. Keep the pace slow enough that you feel the obliques working on every rep, rather than relying on momentum to swing your legs back and forth.
Common Bicycle Crunch Mistakes
Most people who feel bicycle crunches “in their neck” are making one of a few fixable errors.
Pulling on the head is the most common issue. Your hands should cradle your skull for light support only. The lift should come entirely from your abdominal contraction.
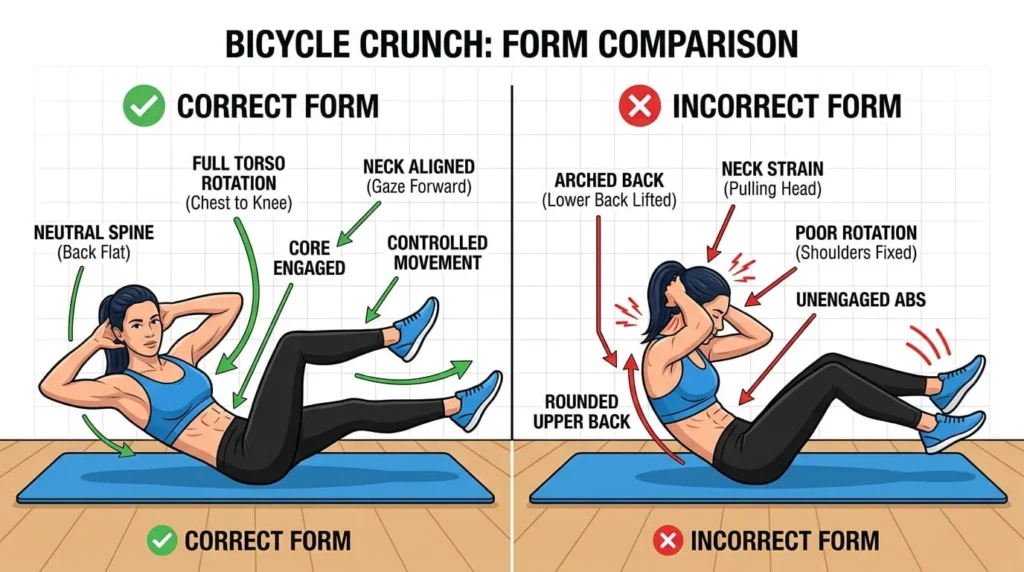
Moving too fast is a close second. Speed replaces muscle tension with momentum, which cuts the exercise’s effectiveness and increases strain on the spine. Slowing down and pausing briefly at each rotation makes the movement noticeably harder in a good way.
Letting the lower back arch off the mat is another frequent problem. If your back lifts away from the floor, your hip flexors are compensating for weak core engagement. Bend your knees more, shorten your range of motion, and rebuild from there.
Finally, shallow rotation limits results. If your elbow barely moves toward your knee, you are not fully engaging the obliques. Focus on rotating your whole ribcage rather than just reaching with your arm.
How Many Bicycle Crunches Should You Do
For most people, 2 to 3 sets of 10 to 15 reps per side is a solid starting point. Beginners can start lower, closer to 8 reps per side, and focus entirely on form before adding volume.
Because bicycle crunches are a bodyweight endurance movement, quality matters far more than quantity. A slow set of 10 controlled reps per side will build more strength than 30 rushed reps that rely on leg swing instead of core contraction. As your control improves, add reps gradually or slow the tempo further rather than racing to a higher number.
Bicycle Crunch Variations
Standing Bicycle Crunch
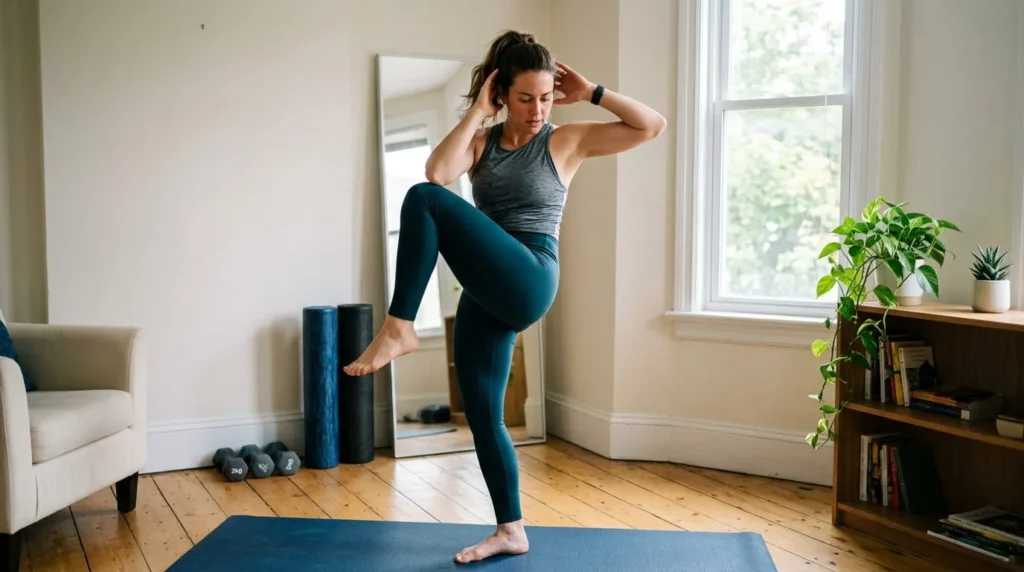
If lying rotations bother your neck or lower back, the standing version is a useful substitute. Stand with feet hip-width apart, hands lightly by your ears, and drive one knee up to meet the opposite elbow. It removes spinal loading while still training the same rotational pattern.
Weighted Bicycle Crunch
Once bodyweight reps feel easy with strict form, holding a light dumbbell or medicine ball against your chest adds resistance. This should only be added after form is consistent, since extra load will expose any remaining technique flaws.
Slow Tempo Bicycle Crunch
Slowing each rotation down to a 3 or 4 second count, with a brief pause at full extension, shifts the exercise from a cardio-style movement toward a strength-focused one. This variation is particularly useful for people rebuilding core control after a back issue.
Benefits of Bicycle Crunches
Bicycle crunches build strength across more of your core than an isolated crunch or sit-up, since the twisting motion recruits the obliques directly. A stronger core supports everyday movements like lifting, carrying, and turning, and it plays a supporting role in exercises like squats and deadlifts.
The rotational demand also improves coordination between your upper and lower body, since the arms and legs need to move in opposite, synchronized patterns. Some people use a faster tempo version as a light cardio addition to a core circuit, though the strength benefits come primarily from controlled, deliberate reps rather than speed.
Who Should Modify or Avoid Bicycle Crunches
Anyone with an existing lower back injury should get clearance from a physical therapist or doctor before adding spinal flexion exercises like this one. The same applies during pregnancy, when rotational core work and lying flat on your back are often not recommended, particularly past the first trimester.
If you feel sharp pain, numbness, or persistent neck strain despite correcting your form, stop the exercise and try the standing variation instead. Mild muscle fatigue in the abs and obliques is expected. Pain in the joints, neck, or lower back is not, and it is a signal to adjust or substitute the movement.
Adding Bicycle Crunches to Your Workout
Bicycle crunches work well at the end of a strength session, in a dedicated core circuit, or as part of a warmup to activate the abs before heavier lifting. They pair naturally with planks, which train the core statically, and with exercises like Russian twists or dead bugs, which add rotational or anti-rotational variety.
Two to three sessions per week is enough for most people to see steady improvement in core endurance. As with any bodyweight movement, consistency and clean form will get you further than adding extra sets before you have full control of the basic pattern.


