


Good deadlift form comes down to keeping the bar close to your body, your spine neutral, and your hips and shoulders rising together instead of your hips shooting up first. Get those three things right and the rest of the lift tends to fall into place.
The deadlift looks simple: bend down, grab the bar, stand up. That simplicity is part of why so many lifters get hurt doing it. The lift asks your hips, hamstrings, glutes, lats, and spinal erectors to work together under load, and if one part breaks down, the bar path breaks down with it.
What Good Deadlift Form Actually Means
There’s no single “correct” deadlift stance that fits every body. A 6’4″ lifter with long femurs is not going to set up the same way as someone 5’2″ with a shorter torso. What stays constant across every body type is the bar path: straight up, brushing the shins and thighs, with the bar staying over the middle of the foot from start to finish.
The National Strength and Conditioning Association’s technique guidelines describe a neutral spine and a vertical bar path as the two non-negotiables of the pull. Everything else, stance width, grip style, bar height, gets adjusted to the lifter in front of you.
1. Foot and Bar Position
Stand with your feet roughly hip-width apart, toes pointed slightly out. The bar should sit over your mid-foot, close enough that your shins are nearly touching it before you even bend down. If you have to reach forward to grab the bar, it’s too far away and your hips will end up too high.
2. Grip Options
A double overhand grip works for lighter and moderate loads. Once the bar gets heavy enough that it starts rolling out of your hands, most lifters switch to a mixed grip (one palm facing you, one facing away) or start using hook grip, where the thumb is trapped under the fingers. Hook grip takes some getting used to and it’s uncomfortable at first, but it keeps both shoulders working evenly, which a mixed grip doesn’t.
How to Do a Deadlift Step by Step
If you’re learning how to do a deadlift for the first time, break it into three phases: the setup, the pull, and the lockout. Rushing through the setup is where most bad reps start.
1. The Setup
Walk up to the bar until your shins are close to touching it. Push your hips back and bend down to grab the bar with your feet under your hips. Before you pull, take the slack out of the bar by pulling up gently until you hear or feel the plates settle and the bar tension increase.
Your shoulders should sit slightly ahead of the bar, your chest up, and your lats pulled tight, as if you were trying to crush an orange in each armpit. That lat tension is what keeps the bar traveling in a straight line instead of drifting away from your shins.
2. The Pull
Take a breath, brace your core the way you would before someone punched you in the stomach, and push the floor away with your legs. Your hips and shoulders should rise at the same rate. If your hips shoot up first and your chest stays pinned to the floor, the bar drifts forward and the load shifts onto your lower back instead of your legs and glutes.
Keep the bar in contact with your shins and thighs the entire way up. A bar that drifts even two or three inches away from your body adds a meaningful amount of leverage against your spine.
3. Lockout and Descent
Finish the rep by squeezing your glutes and standing fully upright, with your hips and knees locked out at the same time. Don’t lean back or hyperextend your lower back at the top; standing tall is the goal, not arching.

To lower the bar, push your hips back first, let the bar slide down your thighs, and bend your knees once the bar passes them. Control the descent instead of dropping it, especially in a commercial gym where a dropped bar can bounce unpredictably.
Common Deadlift Barbell Form Mistakes
Rounding the lower back under load is the mistake that draws the most attention, but it’s usually a symptom of a setup problem rather than the root cause. If the bar starts too far from your shins, your body naturally rounds forward to reach it.
A second common issue is letting the bar drift away from the legs during the pull, usually because the lats aren’t engaged before the lift starts. Once the bar swings forward even slightly, your lower back has to work much harder to keep you from folding over.
Hyperextending at the top, jerking the bar off the floor instead of building tension first, and looking up at the ceiling during the pull are three smaller habits that add up. Looking up tends to push your chin forward and your upper back out of a neutral position, which changes how force travels through your spine.
Deadlift Form Cues That Actually Help
Coaching cues work because they translate a technical instruction into something your body can actually act on mid-lift. “Push the floor away” tends to work better than “stand up,” because it directs effort into your legs instead of your lower back.
“Protect your armpit” or “crush an orange in your armpit” is a common lat-engagement cue that keeps the bar close through the whole pull. “Hips and shoulders rise together” is worth saying out loud on your first few warm-up sets until it becomes automatic.
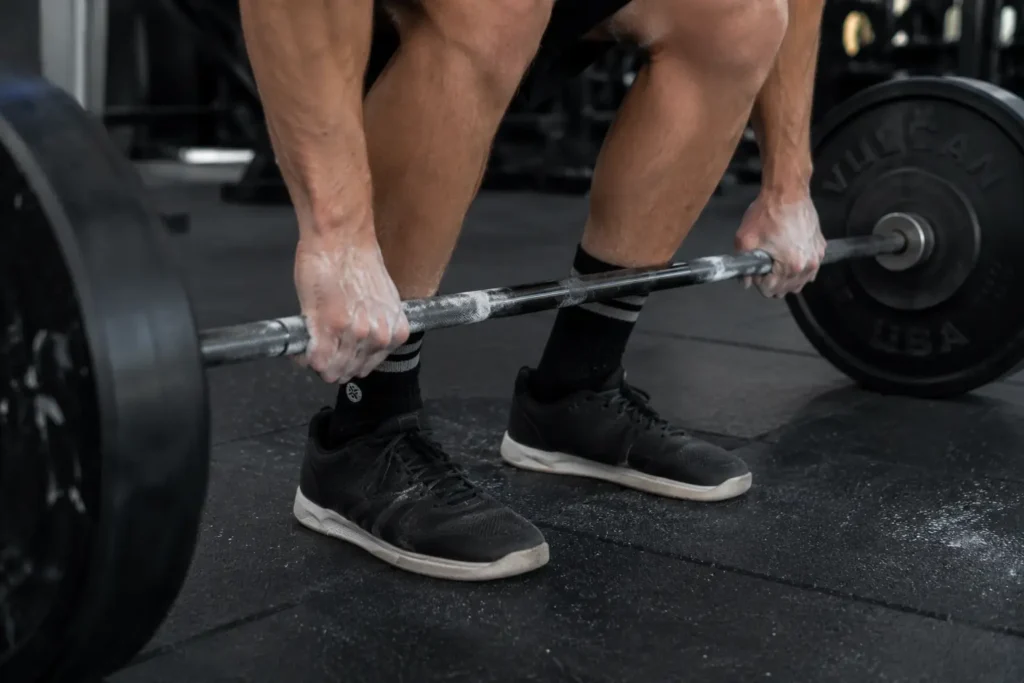
One method that gets overlooked: film your sets from directly to the side, at hip height, rather than from the front. A front-on video hides bar drift almost completely. A side view at hip height shows exactly where the bar travels relative to your shins, which is the single clearest way to self-correct your deadlift barbell form between sessions.
Deadlift Variations and When Form Changes
Conventional and sumo deadlifts share the same core principles, a neutral spine and a vertical bar path, but the setup looks different. Sumo uses a wider stance with the hands inside the knees, which shortens the distance the bar has to travel and shifts more of the work onto the hips and inner thighs.
Trap bar deadlifts change the load path further, since the handles sit at your sides instead of in front of you. That tends to be a friendlier entry point for beginners still building the hip hinge pattern, since it’s easier to keep a neutral spine with the weight distributed evenly around the body.
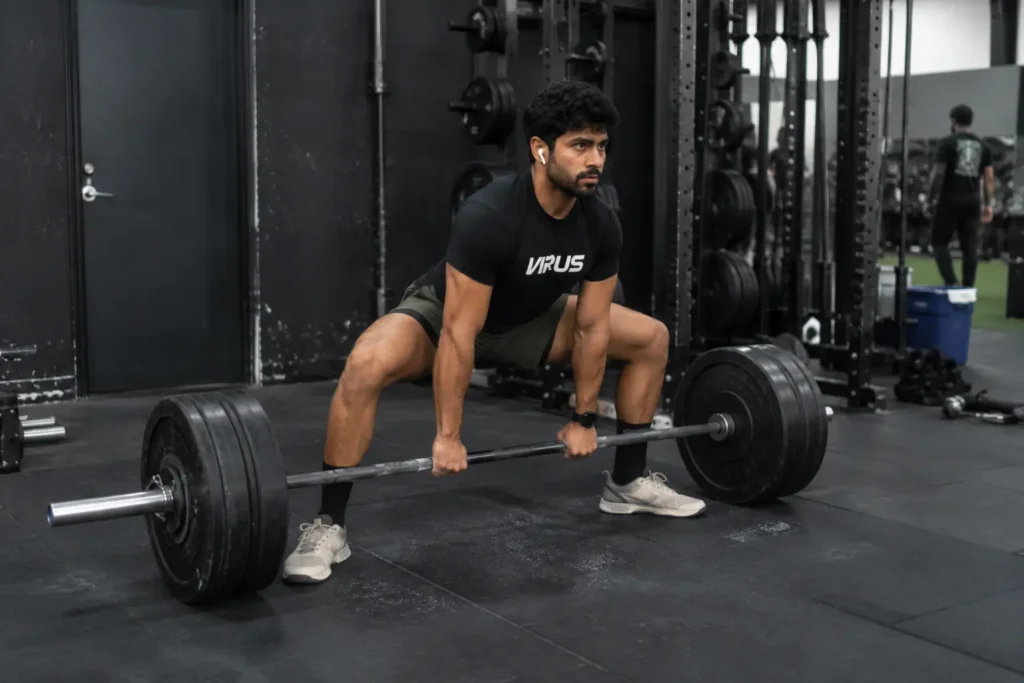
Romanian deadlifts train the hip hinge without the bar starting from the floor, which makes them a useful accessory movement once your setup and pull are solid on the standard lift. Strength coach Mark Rippetoe, whose Starting Strength method popularized the conventional low-bar setup taught in many gyms, has long argued that the hip hinge pattern itself matters more than which variation you choose to train it.
How Often to Train Deadlift Form
Form work benefits from frequency more than heavy loading does. Pulling light to moderate weight two or three times a week, with a genuine focus on bar path and bracing, builds the pattern faster than one heavy session where fatigue makes technique harder to control.
Many lifters make the most progress by deadlifting for low reps, three to five per set, rather than high-rep sets where fatigue causes the last few reps to fall apart. A rep that starts breaking down in form isn’t building the pattern you actually want.
If you’re new to the lift, working with a certified strength coach for even a handful of sessions is worth it. A coach watching from the side can catch a hip that rises too early or a bar that drifts forward in a way you won’t feel yourself until it’s already a habit.