
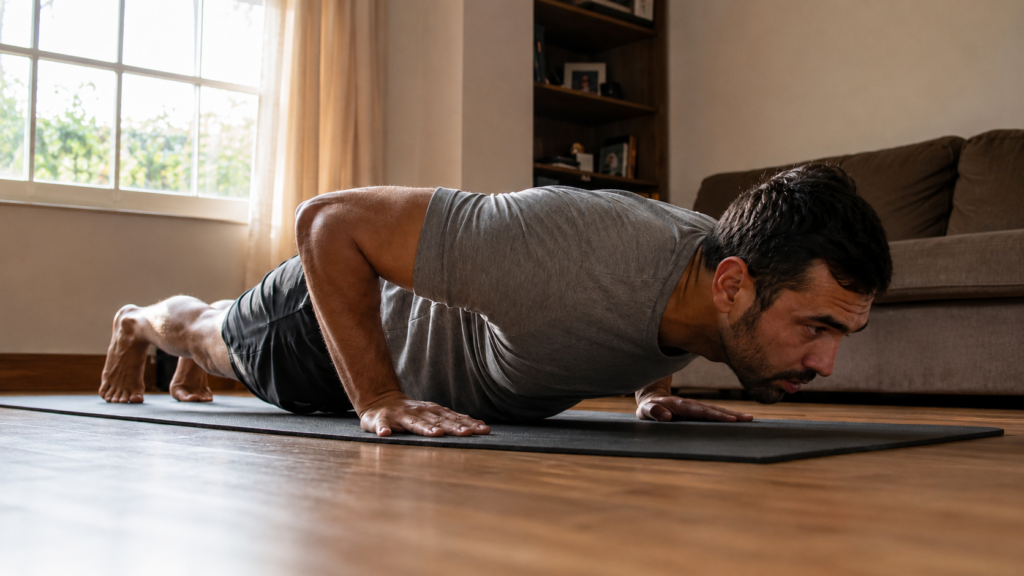

A pushup works when your body moves as one straight line from your shoulders to your ankles while your chest lowers to just above the floor and your elbows stay at roughly a 45 degree angle from your torso. Get those two things right and the rest of the movement follows. Get them wrong and you can do a hundred reps a week without your chest, shoulders, or triceps getting any stronger.
This guide breaks the pushup down piece by piece, covers the mistakes that quietly stall most people’s progress, and gives you a real path from zero pushups to a rep count you’re proud of. Whether you’re doing your first rep this week or trying to push past a plateau you’ve been stuck at for months, the fixes below apply the same way.
The Correct Push Up Form, Step by Step
Start on your hands and toes with your palms flat on the floor, roughly shoulder width apart or a couple of inches wider. Your fingers should point forward, not out to the sides, since that keeps stress off your wrists.
Walk your feet back until your body forms a straight line from head to heels. Squeeze your glutes and pull your belly button in slightly toward your spine. This one adjustment fixes more bad pushups than anything else on this list.
Lower your body by bending your elbows, keeping them at about 45 degrees from your sides rather than flared straight out. Stop when your chest is an inch or two off the ground. Push back up through your palms until your arms are straight but not locked, then repeat.
Breathe in on the way down and out as you push up. It sounds minor, but holding your breath through a set is one of the fastest ways to run out of gas after five reps.
1. How Low Should You Go
Full range of motion means your chest gets close to the floor, not that you touch your nose to it. If your shoulders start rounding forward or your lower back sags before you get there, that’s your actual depth limit for now, and it will improve with practice.
A simple way to check your depth without a mirror is to place a small object, like a folded towel or a tennis ball, on the floor under your chest. Lower until you lightly tap it, then push back up. This gives you a consistent target to hit every rep instead of guessing how far down you actually went.
Common Push Up Mistakes That Slow Your Progress
Sagging hips are the most common issue. When your core isn’t engaged, gravity pulls your midsection toward the floor, which turns a chest and triceps movement into a lower back strain waiting to happen.
Flared elbows are the second big one. Elbows pointing straight out to the sides at 90 degrees put unnecessary strain on the shoulder joint. Tucking them closer to your body redirects the work to your chest and triceps where it belongs.
A partial range of motion is the third. Lowering only a few inches and calling it a rep builds a habit, not strength. If full depth isn’t available yet, a regressed version of the pushup with full range of motion will build more real strength than a shallow version of the standard one.
Neck position gets overlooked often. Craning your neck to look forward or dropping your chin to your chest both throw off the straight line your spine needs. Keep your gaze on a point on the floor a foot or two in front of your hands and let your neck stay neutral.
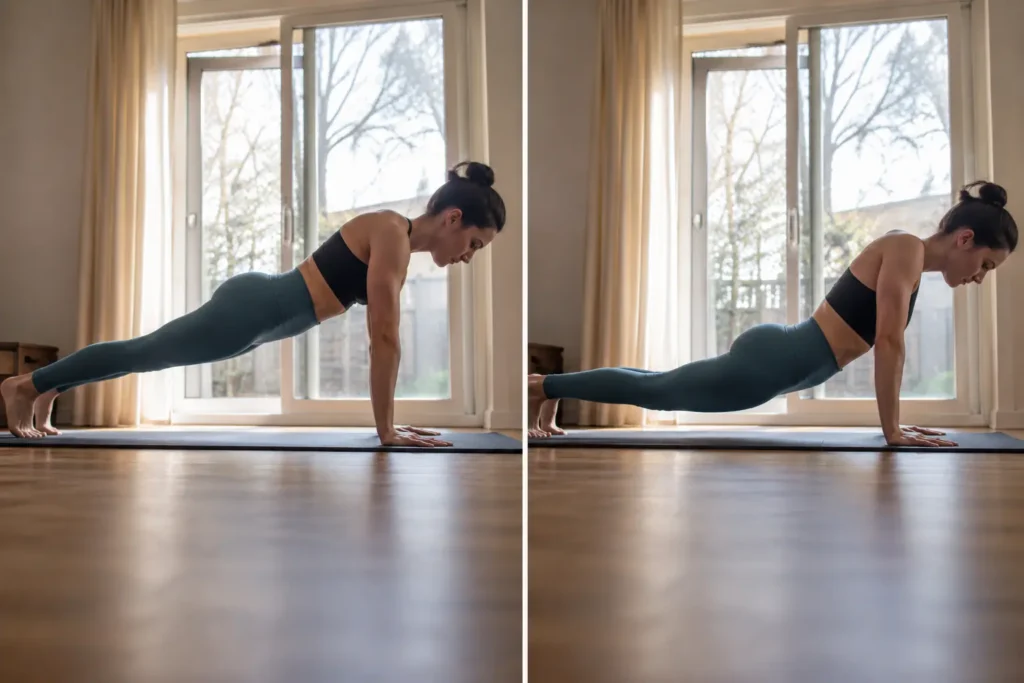
Wrist pain is usually a positioning problem, not a sign you’re not built for pushups. If your wrists ache, try rotating your hands out a few degrees, or use a pair of dumbbells or push up handles so your wrists stay in a neutral position instead of bending back under load.
How to Do Push Ups for Beginners
If a standard pushup on the floor isn’t happening yet, that’s normal, and it’s not a strength problem you fix by forcing reps. It’s a starting point problem you fix by regressing the movement until your form holds up for every single rep.
1. Wall Push Ups
If knee pushups still feel like too much, start even easier with wall pushups. Stand an arm’s length from a wall, place your palms flat against it at shoulder height, and bend your elbows to bring your chest toward the wall before pushing back to start.
This version carries almost none of your bodyweight, which makes it a genuinely useful starting point rather than a lesser version of the real thing. Once 15 to 20 wall pushups feel easy across a few sessions, move on to the knee version below.
2. Knee Push Ups
Drop to your knees instead of your toes, keeping the straight line from your head through your hips to your knees. This shortens the lever your upper body has to move, which makes the same motion noticeably lighter without changing the muscles doing the work.
Aim for three sets of as many clean reps as you can manage, resting a minute or two between sets. Once you can do 15 to 20 knee pushups with full range of motion, you’re ready to try a few standard ones.
3. Incline Push Ups
Place your hands on a sturdy surface like a bench, a low table, or a staircase step, and keep your feet on the floor. The higher the surface, the easier the pushup, so you can dial the difficulty up or down as you go by choosing a lower surface each week.
This version keeps your body in the full straight line position, which makes it a closer match to a standard pushup than the knee version. Many people use it as the last step before their first floor pushup.
How to Get Better at Push Ups
Consistency beats intensity here. Three sessions a week where you train pushups to a couple of reps short of failure will get you further than one brutal session that leaves you sore for four days and skipping the next two workouts.

Track your numbers. Write down the reps and sets you hit each session, even if it’s just three sets of six. Seeing the numbers move over a few weeks is what keeps most people going when progress feels slow day to day.
Strengthen the supporting muscles too. Planks build the core stability that keeps your hips from sagging, and triceps work like bench dips gives you extra pushing strength for the last few reps of a set.
Rest matters as much as the reps themselves. Muscle gets built during recovery, not during the set, so give yourself at least one rest day between pushup-focused sessions, especially early on.
A short warm-up helps too. A minute of arm circles, a few shoulder rolls, and a couple of easy incline pushups before your working sets get blood into the muscles you’re about to use and lower the odds of shoulder or wrist strain, especially on cold mornings.
How to Do More Push Ups Over Time
Once you can do 10 to 15 standard pushups with good form, the next step is adding volume gradually rather than testing your max every session. A simple approach: pick a number that’s 70 percent of your best set, do that many reps for five sets with short rests, and repeat that workout twice a week.
Every week, add one rep per set or one extra set, whichever feels manageable. This slow, steady approach builds real endurance instead of burning you out trying to hit a personal record every time you train.
Pyramid sets work well too. Do one pushup, rest 10 seconds, do two, rest 10 seconds, do three, and keep climbing until you can’t complete a clean rep at that number. This method tends to add up to more total reps than a few straight sets ever would.
Grease the groove is another option worth trying, particularly if you’re short on time. Instead of one dedicated workout, do a handful of pushups, well short of failure, several times throughout the day, like every time you walk past a certain doorway. Spreading the volume out this way lets your nervous system practice the movement more often without the fatigue that builds up in a single long session.
Push Up Variations to Try Once You’re Consistent
Once standard pushups feel manageable for three sets of 12 or more, variations shift the emphasis to different muscles and keep the movement from getting stale.
1. Diamond Push Ups
Bring your hands together under your chest so your thumbs and index fingers touch, forming a diamond shape. This narrow hand position shifts more of the load onto your triceps, and it’s noticeably harder than the standard version, so expect your rep count to drop the first few times you try it.
2. Wide Push Ups
Place your hands wider than shoulder width, roughly a foot and a half apart. This shortens the range of motion slightly and puts more emphasis on your chest, particularly the outer portion.

3. Decline Push Ups
Put your feet up on a bench, chair, or step while your hands stay on the floor. Elevating your feet increases the percentage of your bodyweight your upper body has to press, which makes this a harder variation that targets your upper chest and shoulders more directly.
4. Archer Push Ups
Set your hands wider than a standard pushup, then lower your body toward one hand while your other arm stays straight and slides out to the side. This shifts almost all the load onto the bent arm, which makes it a solid step toward a one-arm pushup for anyone who has maxed out the other variations here.
Start with a handful of reps per side and expect it to feel unfamiliar at first. The balance and single-arm strength it demands take a few sessions to click into place.